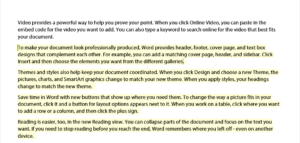
Microsoft doesn’t have a catchy name for this feature, but I’ll try to describe it. In Word for Windows, you can select document text, then apply Read-only protection, but with Exceptions. By default, the exception is Everyone. If we untangle the word logic, this means that the document becomes read-only except that everyone can edit the selected text. It’s a far better solution than the old protection for forms.
Here are the steps for creating protect area exceptions in Word for Windows:
- Select a document area that is to remain editable.
- Choose Review>Restrict Editing (or Developer>Restrict Editing, if your Developer tab is visible).
- Under Editing Restrictions, check Allow only this type of editing in the document.
- Leave the drop down set to No change (Read only).
- Under Exceptions, choose Everyone.
- Click on Yes, Start Enforcing Protection.
To add more editable areas, click on Stop Protection. Then repeat steps 1 to 5 for new each editable area.
When this type of protection is applied, the selected areas become shaded in light yellow as a visual cue that the highlighted text remains editable. Please note that once editable areas are added, there is no method within Word to remove them. But you can use the hacking method below to remove them from your document.
Users of Word 2016 for Mac and 2019 for Mac (including Microsoft 365 subscribers) can use these protected documents, but haven’t be able to produce them. At least, until now.

Word pros will look at the square bracket and think it’s a bookmark. It’s not. Microsoft reused the bookmark character to show a Permission Range. To add these editable ranges on a Mac, we’re going to create one manually.
To start, apply Read-only protection to the document. Use Tools>Protect Document, then check Protect document for. Click on Read only, then on OK. Save the file.
Now open the file in your XML editor. OOXML Tools in the Chrome browser is fine for this job. Open document.xml inside the word folder.
Just before the text that you want to be editable, insert a line like this:
<w:permStart w:id="883447734" w:edGrp="everyone"/>
At the end of the editable text, insert this XML:
<w:permEnd w:id="883447734"/>
The beginning and end tag must have the same 9-digit random number. Each pair of tags in a document must have a different random number.
Here is a whole paragraph marked as editable:
<w:permStart w:id="783447734" w:edGrp="everyone"/>
<w:p w14:paraId="5B68C6A9">
  <w:r>
    <w:t>To make your document look professionally produced, Word provides header, footer, cover page, and text box designs that complement each other.</w:t>
  </w:r>
</w:p>
<w:permEnd w:id="783447734"/>
Here, just one word is editable:
professionally produced, <w:permStart w:id="983447734" w:edGrp="everyone"/>Word<w:permEnd w:id="983447734"/> provides header,
It’s that simple. Save the file and distribute to users.
For any of our tips that seem too complicated, Brandwares is available to do it for you. We teach the pros!
