Unlike most of my articles, this one is not a piece of original research. Shauna Kelly wrote the definitive method for producing outline numbering in Word several years ago. Unlike most of what you’ll read about techniques for creating numbering in Word, Shauna’s procedures actually work reliably. Unfortunately, Ms. Kelly passed away several years ago, though her web site has been kept going by volunteers. You can read her original posts here: How to create numbered headings or outline numbering in Word 2007 and Word 2010. My contribution is to document the steps needed to produce outline numbering in Word for macOS.
The names of some commands are different, or they’re found in a different place. I’m sticking to the step-by-step approach. For an in-depth explanation of why the steps work, please consult Shauna’s original pages. These instructions are quite specific. Please don’t include any steps not on the list below, or you’re on your own for the results.
Shauna argued strongly for using the built-in heading styles Headings 1 through 9. There’s nothing wrong with this and it can save a few steps. Sometimes, however, I prefer to save heading styles for headings and create a separate set of styles for numbering. In this article, I’ll translate Shauna’s classic method. The next post shows some optional variations: Outline Numbering Variations. If this is to be the basis for future documents, you want to be making these changes in a template. If you do this in a document and don’t apply the changes to the source template, you’ll have to redo all these steps for the next document or copy the styles using Word’s Organizer (Tools>Templates and Add-ins>Organizer in Word for Mac). Whenever you copy outline numbered sequences, you need to copy the styles that are linked (Headings 1 to 9 in this example) plus the List style (Numberings in this case).
Outline Numbering in Word for macOS – The Classic Method
Setting up the Styles
Choose Format>Style and select Heading 1. (If you’re not already using Heading 1 in your document, change the List: dropdown to All styles)
Click on the Modify button.
Change the Style based on: dropdown from Normal to (no style) at the top of the list, then click on OK. While the dialog is open, choose Format>Paragraph and set the Left indent to 0 and the Special indent to (none). If there is any indenting, these will be set later. If you had already formatted Heading 1, you may need to make some changes after detaching it from Normal.
Select Heading 2, click on Modify and change Style based on: to Heading 1. OK out.
Repeat step 3 for each built-in Heading style, for as many levels of outline numbering as you require. Each style should be based on the one before.
Opening the Right Dialog Box
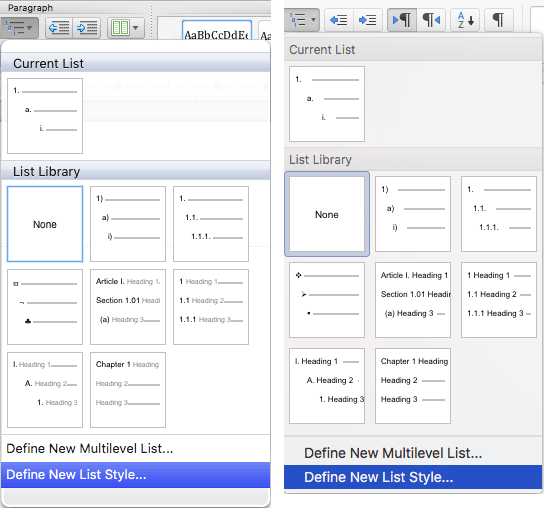
In the Paragraph section of the Home tab, choose Multi-level List>Define New List Style. Avoid starting from Numbered List, that is not reliable. Multi-level List>Define New List Style in Word 2011 (left) and 2016/2019/2021/2024 and 365 (right)
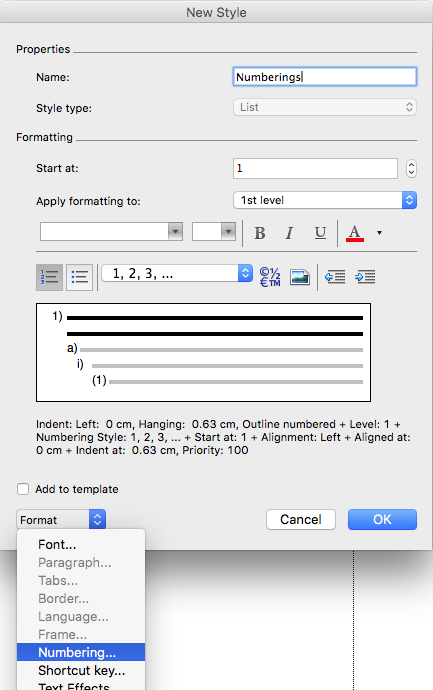
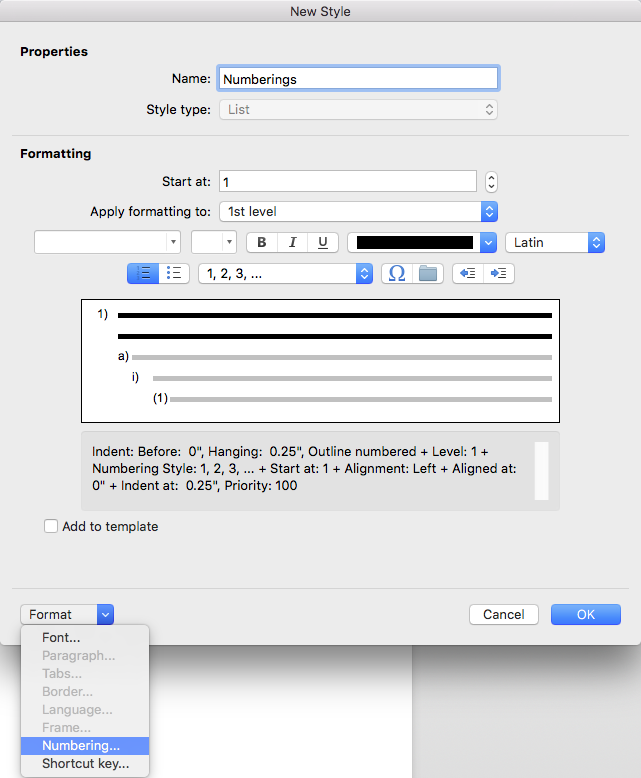
In the Define New List Style dialog, give your style a plural name like Headings or Numberings, since this will apply to several styles.
Click on the Format button and choose Numbering.
Word 2011:Word 2016/2019/2021/2024 and 365:
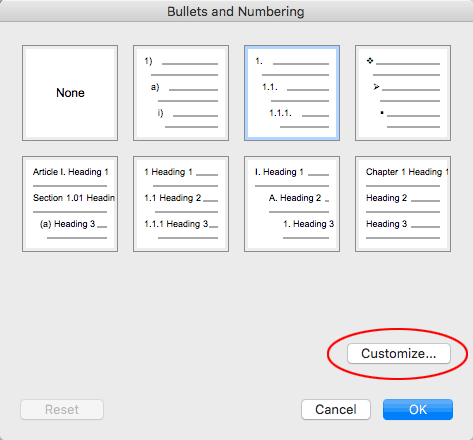
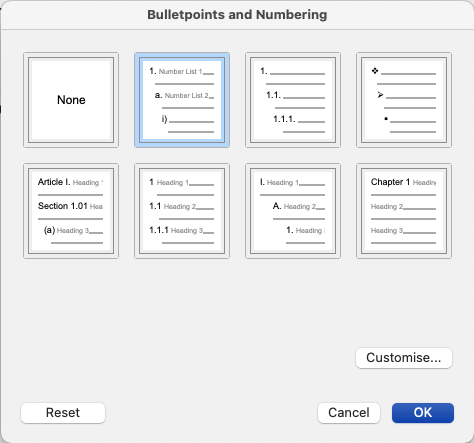
Now the Bulletpoints and Numbering (or Bullets and Numbering) dialog opens, an extra step that doesn’t happen in Word for Windows. If you just need plain legal-style numbering, there is a preset you can select for that. But for custom numbering, click on the Customize button.
Link a Paragraph Style to a List Style
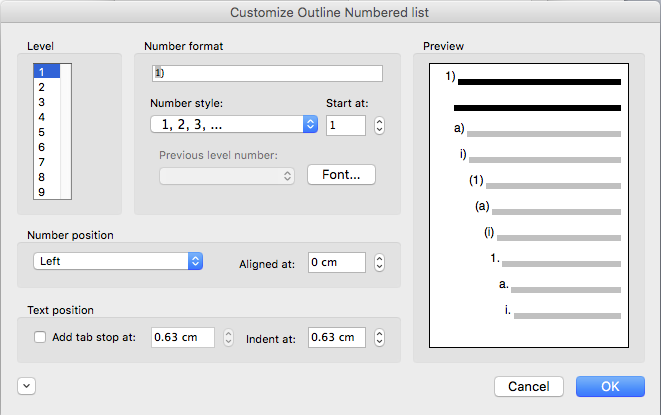
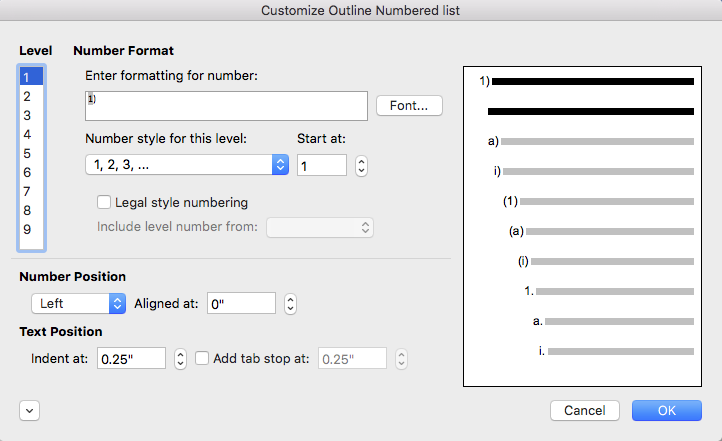
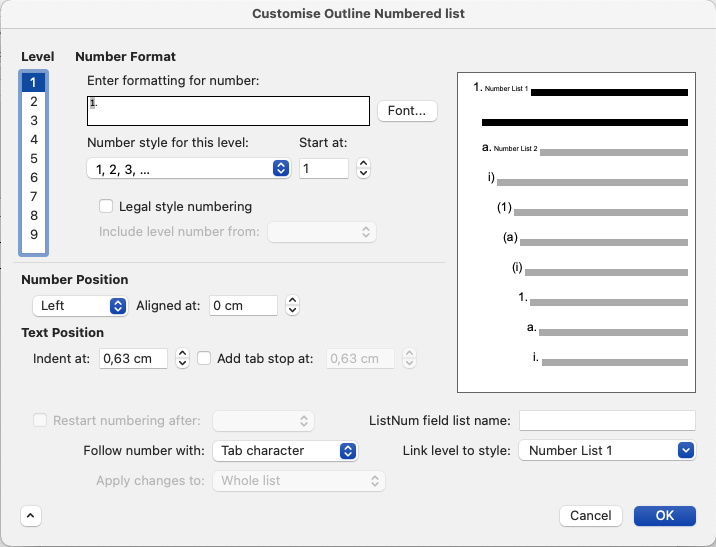
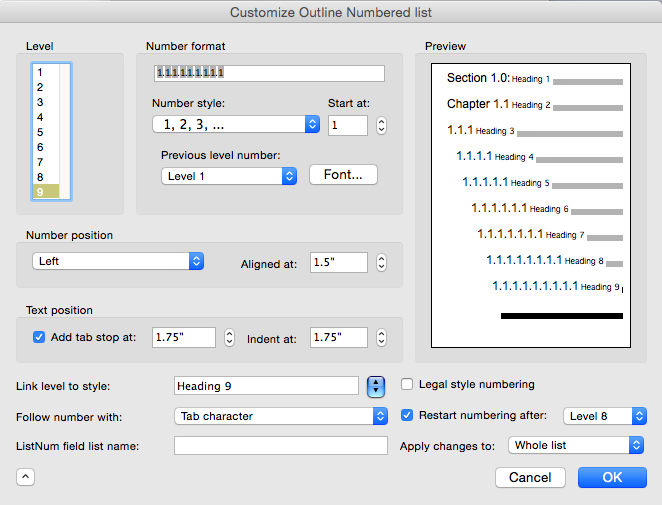
Finally we get to the Customize Outline Numbered List dialog. Once this dialog is open, we will leave it open until all levels are set up. Start by clicking on the dialog expander button (the button in the lower left with a down-pointing arrowhead) to see all the options: Word 2011:Word 2016/2029/2021/2024 and 365:
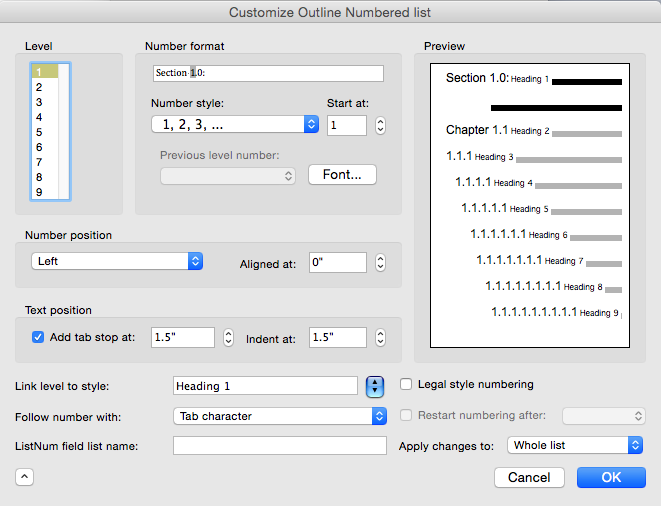
Start by selecting 1 in the Level list.
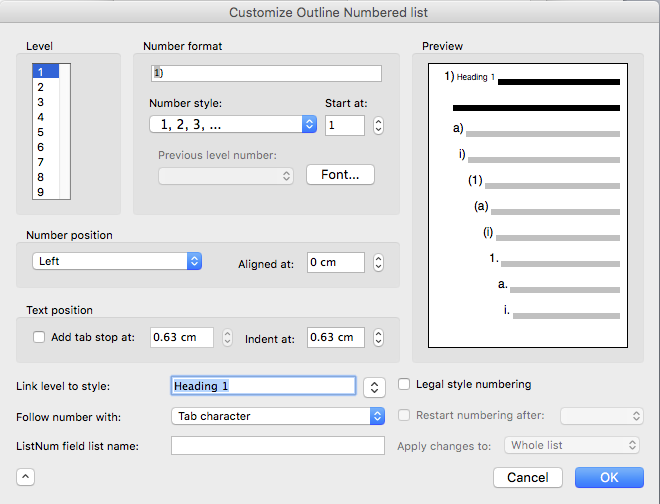
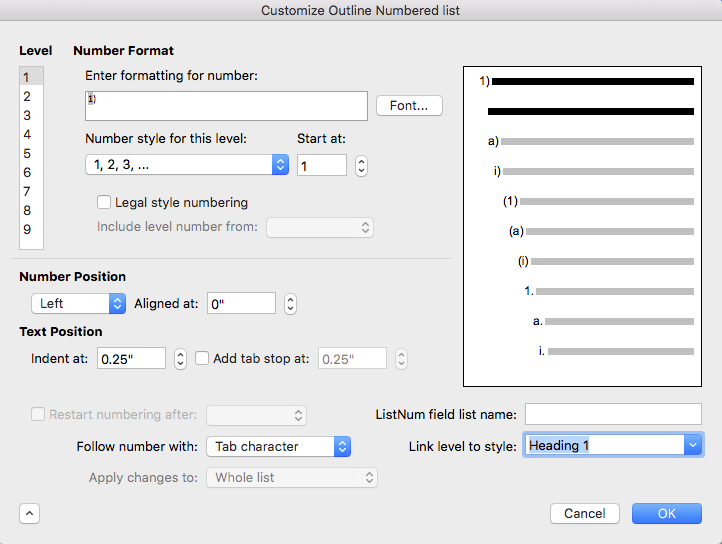
Next, we attach the paragraph style to the list style. Select Heading 1 in the Link level to style dropdown: Word 2011:Word 2016/2019/2021/2024 and 365:
Now set the numbering for the style. In the Number format (Word 2011) or Enter formatting for number (Word 2016/2019/2021/2024 and 365) field, delete any content displayed. If the first outline numbering level starts with text, like Chapter 1 or Section 1, type in the text and a space.
Using the Number style: (Word 2011) or Number style for this level: (Word 2016/2019/2021/2024 and 365) dropdown, choose the number appearance. Outline Numbering in Word for Mac has a quirk: the Level 1 choice is already displayed, even if no number appears in the Enter formatting for number: box. Just click on the dropdown and re-select the Level 1 that already appears selected and Word will do the right thing. A number appears in the Number format: or Enter formatting for number: field.
Return to Number format (Word 2011) or Enter formatting for number (Word 2016/2019/2021/2024 and 365) and add any punctuation, symbol or text that is to follow the number.
Set the Number position and Text position. Both numbers are the distance from the left margin. Left alignment for numbers is most common, but Roman numerals can look better right-aligned, since their width varies more. Normally the tab and indent are set for the same amount. The tab controls the position of the first line, and the indent sets all the lines in the paragraph after that.
Repetition for All Levels (Legal-style Numbering)
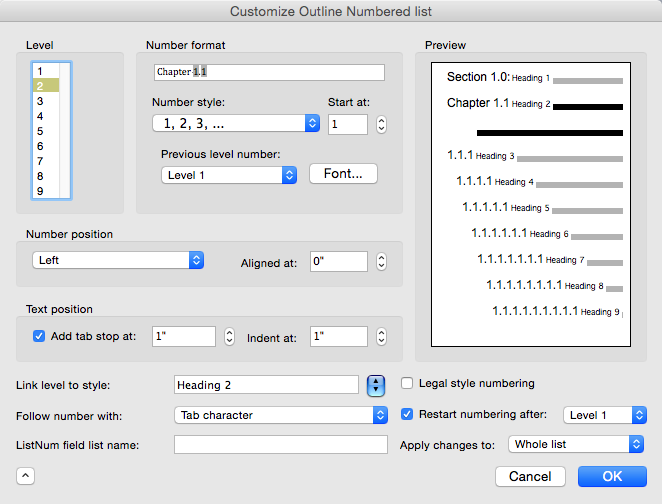
Doing the rest of the levels involves repetitive steps that get a little longer with each level. Here are the steps for level 2:
Select 2 from the Level list.
Choose Heading 2 from the Link level to style dropdown.
Delete the contents of Number Format (Word 2011) or Enter formatting for number (Word 2016/2019/2021/2024/365).
Set Previous level number (Word 2011) or Include level from (Word 2016/2019/2021/2024/365) to Level 1.
In Enter formatting for number, type a period.
Click on the Number style (Word 2011) or Number style for this level (Word 2016/2019/2021/2024/365) dropdown and choose 1,2,3, … or other number style.
Set the Number position and Text position.
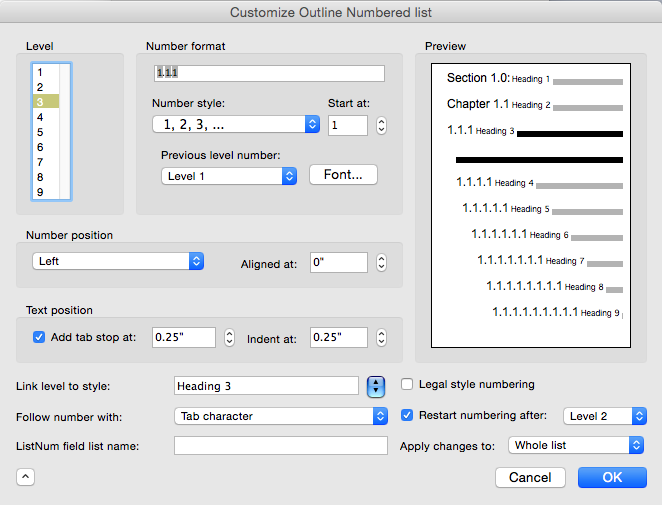
So far, so good. Now let’s do level 3:
Select 3 from the Level list.
Choose Heading 3 from the Link level to style dropdown.
Delete the contents of Number Format or Enter formatting for number.
Set Previous level number or Include level from to Level 1.
In Enter formatting for number, type a period.
Set Previous level number or Include level from to Level 2.
In Enter formatting for number, type a period.
Click on the Number style or Number style for this level dropdown and choose 1,2,3, ….
Set the Number position and Text position.
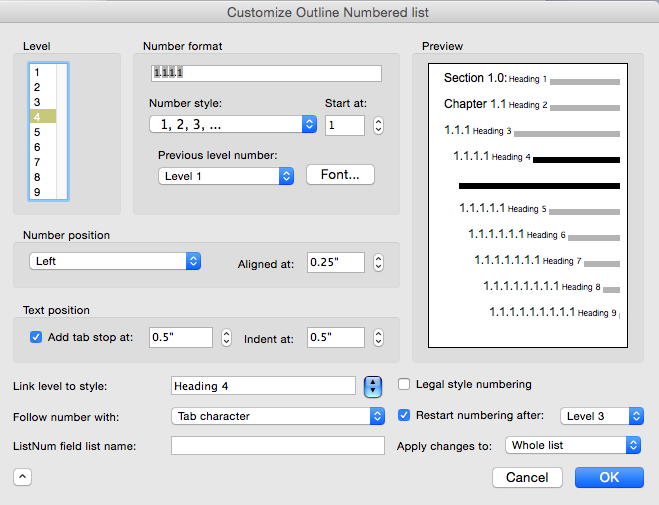
Steps for Level 4:
Select 4 from the Level list.
Choose Heading 4 from the Link level to style dropdown.
Delete the contents of Number Format or Enter formatting for number.
Set Previous level number or Include level from to Level 1.
In Enter formatting for number, type a period.
Set Previous level number or Include level from to Level 2.
In Enter formatting for number, type a period.
Set Previous level number or Include level from to Level 3.
In Enter formatting for number, type a period.
Click on the Number style or Number style for this level dropdown and choose 1,2,3, ….
Set the Number position and Text position.
Are you seeing the pattern? Each additional level repeats the previous steps and adds 2 new steps. By the time you get to level 9, you’ll have set the previous level and typed a period 8 times before setting the last number!
Editing Outline Numbering in Word for Mac
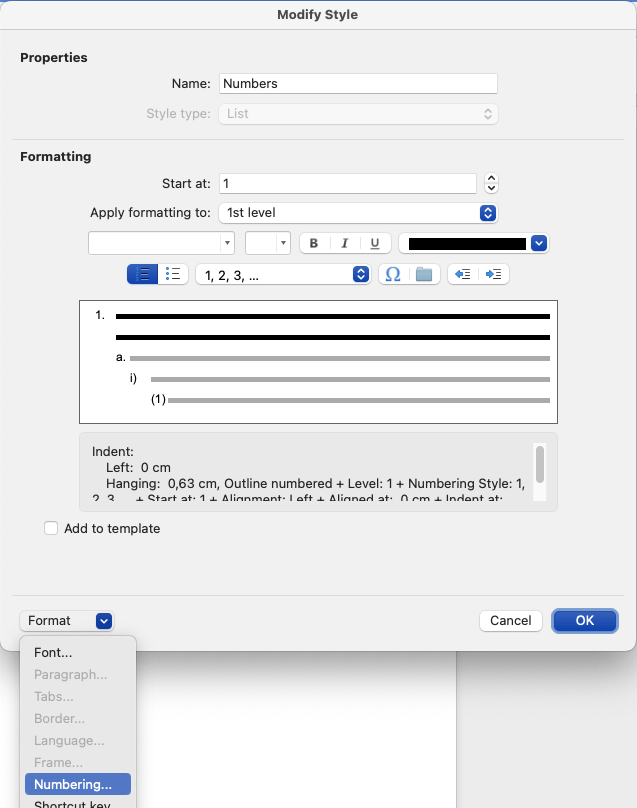
Like every good designer, you’ll probably want to tweak these styles later. For paragraph styling, like the amount of space before or after, you can simply modify the paragraph parameters. That’s easy. In the Quick Style Gallery, right-click on Heading 1 and choose Modify Style.
But for anything to do with the numbering or its positioning relative to the paragraph, you need to edit in the Outline Numbering dialog. Unfortunately, Word for Mac has a completely non-intuitive method for getting a list style into editing mode.
When the insertion point is in an outline numbered style, the Home>Numbering dropdown will be highlighted. But that’s the wrong dropdown for list style editing! Instead:
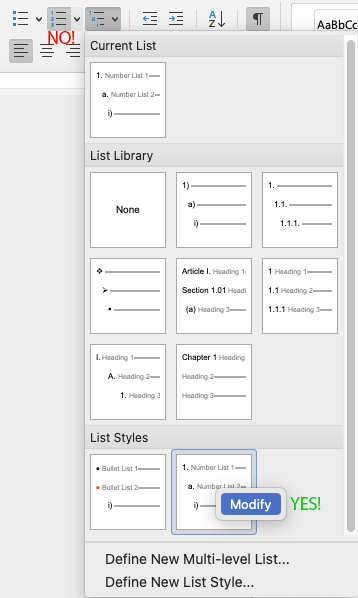
Click on Home>Multi-level List. The custom list style(s) are at the bottom of that dropdown below the heading List Styles.
Right-click on the list style you want to change and choose Modify:
In the Modify Style dialog, choose Format>Numbering.
In the Bulletpoints and Numbering dialog, look at the highlighted list style. It should display the paragraph style names in the preview, the styles that are attached to the list style. If it does, click on Customize.
The Customize Outline Numbered list dialog opens, where you can teak the numbering, lettering and/or bullets, and the indentation.
OK out when you’re done. The numbered style should automatically update.
Outline Numbering in Word for OS X: The Customize Outline Numbered list Dialog
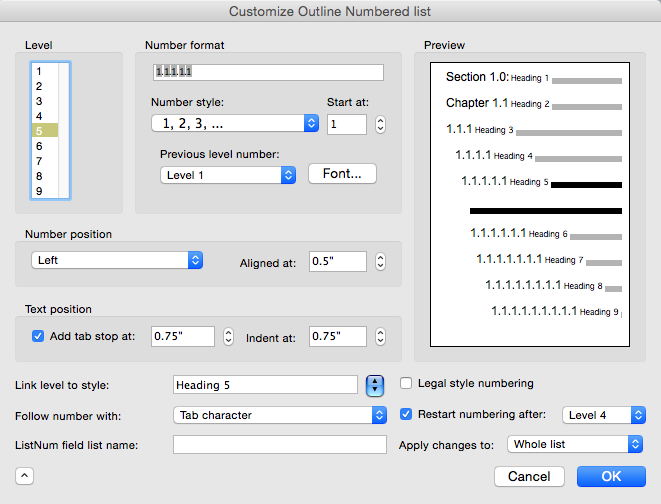
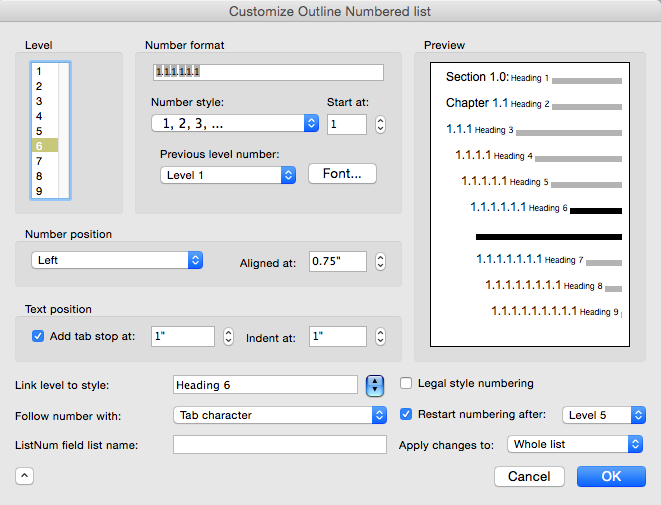
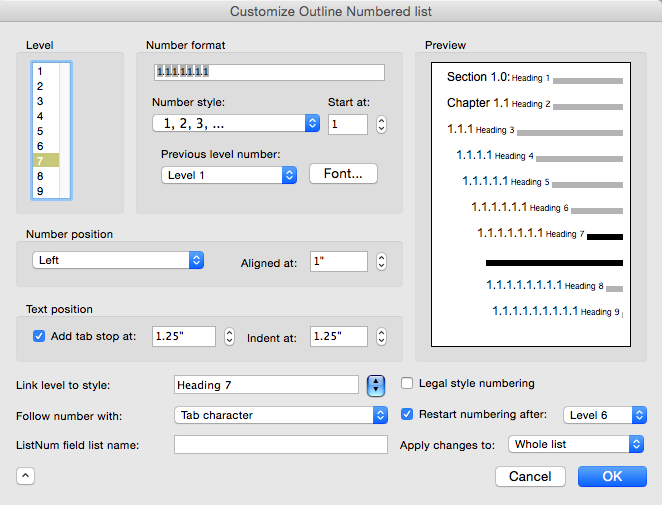
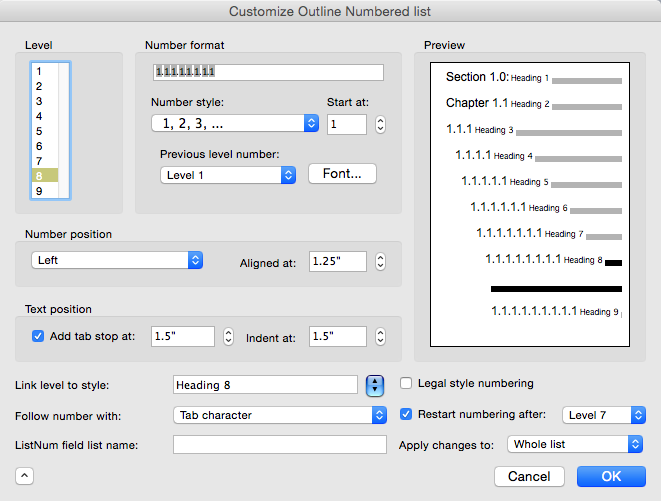
Here are the final results for an outline numbered style. These shots are from the same dialog, only the Level number has been changed.
You can use Brandwares’ expertise to set up your outline numbering. Contact me at production@brandwares.com for an estimate.
5:11 pm
4 thoughts on “Outline Numbering in Word for macOS – Best Practices”
Word for MacOS Sonoma 14.2 SUCKS. You provided instructions for Word in 2011 and 2016, but this is 2024 John, and most of it is useless. When will Microsoft get off their comfortable derrieres and develop a version that is reliable?
I am tired of relying on YouTube for answers -that only work sometimes.
Put on your BIG-BOY pants and fix this crap, PLEASE.
The steps in 2024 version of Word for Mac are exactly the same as what is published in the article, with the exception that “Multilevel List” is now called “Multi-level List”. The appearance of the dialogs has changed a little, but the command names are still the same.
As always, if you have trouble implementing the information on your own, we are available to do it for you.
I’ve found a number of pages that include the option to “set for all levels,” but those seem to only apply to the Windows versions of Word. Is there no way to adjust the indentation for all levels of a multi-level list at the same time? Or do I have to adjust level-by-level?
Yes, you must apply indentation one level at a time in Word for Mac.