Content Controls for macOS – Cool Code
June 2023 Update: I’ve created a VBA add-in for Word for Mac that allows you to more easily add Content Controls in Word documents, with an interface similar to the Windows version. I’m looking for beta testers for this add-in. If you have time to test, please email me (my address is in the Meet the Author sidebar).
Content Controls are an improved form of fillable form field, but the Word for Mac user interface doesn’t include Content Controls for macOS. I show you how to sidestep this limitation to be able to create superior fillable forms.
Microsoft Word for Windows has three different types of fields to use for fillable forms. The oldest of these are Legacy Form Fields, which exist in every version of Word, Windows and Mac, but not DOS, back to the dawn of time. Legacy form fields require the document to be protected for forms, which closes down many formatting options even on unprotected sections. These are the only form fields available in the Mac program interface. Windows version also have ActiveX controls. These generally have a crude appearance. They don’t work at all on Mac versions of Word.
Finally, we have the newest type of form fields, Content Controls. These were introduced on Windows in Word 2007. The collection of controls was expanded a little in 2010 and a little more in 2013. Word 2008 and 2011 can’t use or create them, but in Word 2016 for Mac, the program started honoring Content Controls created in Windows, so they work as expected on both platforms. Unfortunately, the tools to add and modify them are still not in the program.
Please note: A known error occurs if you try to insert a Content Control into an old Word file in .doc format. You’ll see an error like Run-time error 445: Object doesn’t support this action. Update the file to .docx format to fix the issue.
Content Controls for macOS: What Are They?
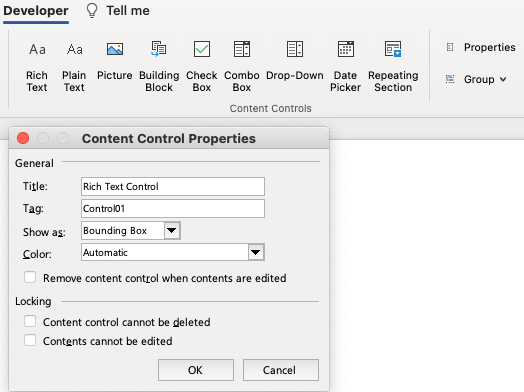
While Legacy Form Fields have only 3 types (Text field, Checkbox and Dropdown), there are 9 (or 10, depending on how you count) types of Content Controls. Here’s a look at each type:

These look identical on the screen. The screen shot shows what they look like unselected (top) and selected (bottom). The Plain Text control is most similar to the Legacy Text form field. All the text has the same formatting and you can’t include other types of content other than text. By comparision, the Rich Text control allows selected text to be bold or italic or a different font. You can insert tables and pictures and even other Content Controls into Rich Text controls.
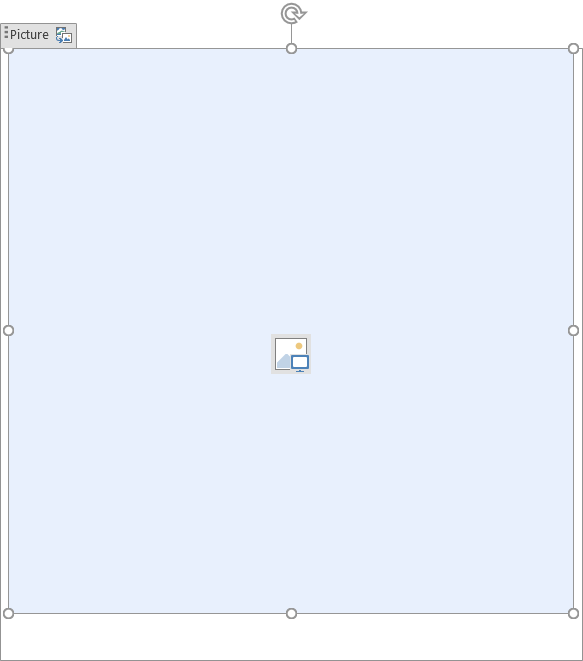
Finally! A true picture placeholder for Word! The picture can be set when the control is created. There are options to allow the user to replace it or not. Or it can be left blank (as shown) for the user to add a picture later. You can change the shape from a square using Picture Format>Picture Styles. This choice can also add a soft edge or other visual effects to a photo that the user inserts later.
It’s worth noting that Picture Content Controls only work as inline pictures. To float them and wrap text around them, you need to place the CC in a table cell or frame or some other object that allows text wrapping. These controls come in at 2″ square, but you can set numeric dimensions on the Picture Format tab. (Thanks to Timothy Rylatt for the tips!)

This is the only Content Control that doesn’t work yet on a Mac. While Building Blocks in the Windows version of Word is the same technology as AutoText on the Mac, Microsoft hasn’t gone the extra mile to make it work on a Mac. The macro further down the page sets the control to work with AutoText (as you almost always should if your template is being distributed to others). But when you click on the control’s AutoText tab, a dropdown list of AutoText entries doesn’t appear like it does in the Windows version.
At least if your Windows client needs it in their template, you can create it on a Mac. AutoText works by grabbing content from the active document’s attached template. If you’re sending a template with AutoText content, the Content Control will find that. If you’re sending a document instead of a template, the Content Control will grab AutoText from the user’s Normal.dotm file.

Similar to the Legacy Check Box form field, but with the added advantage that the filled symbol can be set to other symbols than an X. This control was added in Word 2010, so don’t include one for a client using 2007.
But still no radio buttons? Give me a break, Microsoft! Using elaborate VBA kludges, it’s possible to make a set of checkboxes operate like radio buttons with both Legacy and Content Control versions. But it shouldn’t be so hard!
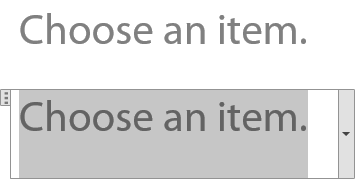
Another similar pair of controls. The Drop-Down is most similar to the Legacy Drop-Down (which MS often refers to as a Combo Box, just to confuse everyone). The Drop-Down restricts users to choosing an item on the list, while a Combo Box allows a user to enter a value that is not on the list.
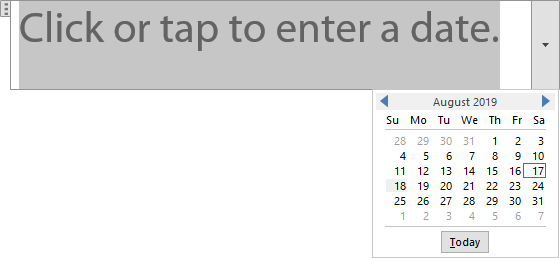
While Legacy Text fields have a date option, it’s only to enforce date formatting after a user tries to enter a date. The Date Picker Content Control is way cooler, it’s pops a little calendar for the user to choose a date visually. Handy!
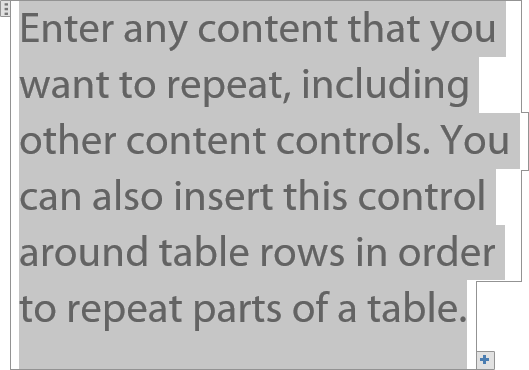
…And the prize for longest prompt text goes to this control. Added to Word 2013, so it won’t work for 2007 and 2010 clients. Clicking on the plus sign in the bottom right corner duplicates the content. There are already a couple of ways to do this, so I think this is strictly for user convenience. Unlike the others, this control spans the page by default, probably because of the long prompt.
No screen capture for this one, because it’s more of an operation than a control. Applying this to a selected set of Content Controls will group them together, so they can be copied as a unit. You can’t include a Rich Text control, which can also be used as a group. If you select controls, then get an error when grouping that a control is “partially covered”, it will usually be about the topmost control. Add a carriage return before, include it when you select, then run the Group macro.
Simple Controls from Keyboard shortcuts
Fortunately, the VBA object model for Word 2016 and 2019 for Mac includes Content Controls. If you’re creating forms for your own use, there is a simple way to create basic Content Controls on your Mac:
- In Word, choose Tools>Customize Keyboard
- Scroll Categories and pick All Commands
- Scroll Commands and pick ContentControlCheckBox
- Click inside the Press new keyboard shortcut field and type a key combination. Word will inform you if that combination is already in use. If there is no conflict, or an insignificant conflict, click on the Assign button. Finally, click on OK. The Control key is a good modifier, because all existing keyboard shortcuts with Control are duplicates of ones that also use the Command key.
- Click on your document where you would like to see a checkbox, then use the keyboard shortcut. Viola! Instant checkbox!
Repeat the steps for the other Content Control commands. It’s not a bad idea to make a sample document with Content Controls and their shortcuts, for later reference. BTW, keyboard shortcuts are the only customization that can access Content Controls. Equivalent commands for the QAT and Ribbon haven’t been added as of this writing.
Content Controls for macOS: Complex Controls for Clients
The keyboard shortcuts are fine for plain vanilla controls. But they’re so basic, some are useless. Sure you can insert a Drop-Down or Combo Box, but they don’t have any items in the list and there’s no easy way to add them. What we need is more fine-grained control so we can set all the same options that a Windows user can. This is possible by inserting them using VBA.
If you never used macros in Word, start by making the Developer tab visible on the Ribbon. Choose Word>Preferences>View and check Show developer tab. The tab becomes visible when you close the Prefs panel.
On the Developer tab, click on the Visual Basic button (Word doesn’t run Visual Basic, but a very similar language called Visual Basic for Applications. This is VBA, not VB, but why would MS care about an accurate button title?). The VBA Editor opens. In the top left corner is a windows called Projects. If you have a fresh installation, you’ll only see Normal here. If you have Add-ins installed, there will be other project names. Select Normal.
From the macOS menu, choose Insert>Module. Call it ContentControls. A new module page is opened where you can insert macro code. Copy and paste the following code onto that page:
Sub AddRichTextCC()
  Dim oCC As ContentControl
  Set oCC = ActiveDocument.ContentControls.Add(wdContentControlRichText, Selection.Range)
  Set oCC = Nothing
End Sub

Sub AddPlainTextCC()
  Dim oCC As ContentControl
  Set oCC = ActiveDocument.ContentControls.Add(wdContentControlText, Selection.Range)
  With oCC
    .MultiLine = True
  End With
  Set oCC = Nothing
End Sub

Sub AddPictureCC()
  Dim oCC As ContentControl
  Set oCC = ActiveDocument.ContentControls.Add(wdContentControlPicture, Selection.Range)
  Set oCC = Nothing
End Sub

Sub AddBuildingBlockCC()
  Dim oCC As ContentControl
  Set oCC = ActiveDocument.ContentControls.Add(wdContentControlBuildingBlockGallery, Selection.Range)
  With oCC
    .BuildingBlockType = wdTypeAutoText
    .BuildingBlockCategory = "General"
  End With
  Set oCC = Nothing
End Sub
Sub AddCheckBoxCC()
  Dim oCC As ContentControl
  Set oCC = ActiveDocument.ContentControls.Add(wdContentControlCheckBox, Selection.Range)
  With oCC
    .Checked = False
    .SetCheckedSymbol CharacterNumber:=&HFE, Font:="Wingdings"
    .SetUncheckedSymbol CharacterNumber:=&HA8, Font:="Wingdings"
  End With
  Set oCC = Nothing
End Sub

Sub AddComboBoxCC()
  Dim oCC As ContentControl
  Set oCC = ActiveDocument.ContentControls.Add(wdContentControlComboBox, Selection.Range)
  With oCC
    .DropdownListEntries.Add "Choose an item.", value:=""
    .DropdownListEntries.Add "Item 1"
    .DropdownListEntries.Add "Item 2"
  End With
  Set oCC = Nothing
End Sub

Sub AddDropDownCC()
  Dim oCC As ContentControl
  Set oCC = ActiveDocument.ContentControls.Add(wdContentControlDropdownList, Selection.Range)
  With oCC
    .DropdownListEntries.Add "Choose an item.", value:=""
    .DropdownListEntries.Add "Item 1"
    .DropdownListEntries.Add "Item 2"
  End With
  Set oCC = Nothing
End Sub
Sub AddDatePickerCC()
  Dim oCC As ContentControl
  Set oCC = ActiveDocument.ContentControls.Add(wdContentControlDate, Selection.Range)
  With oCC
    .DateDisplayFormat = "MMMM d, yyyy"
    .DateDisplayLocale = wdEnglishUS
    .DateCalendarType = wdCalendarWestern
  End With
  Set oCC = Nothing
End Sub

Sub AddRepeatingSectionCC()
  Dim oCC As ContentControl
  Set oCC = ActiveDocument.ContentControls.Add(wdContentControlRepeatingSection, Selection.Range)
  With oCC
    .AllowInsertDeleteSection = True
    .RepeatingSectionItemTitle = "Repeating Section Item"
  End With
  Set oCC = Nothing
End Sub

Sub AddGroupCC()
  Dim oCC As ContentControl
  Set oCC = ActiveDocument.ContentControls.Add(wdContentControlGroup, Selection.Range)
  Set oCC = Nothing
End Sub
Use the Tools>Customize Keyboard command to assign these macros keyboard shortcuts. You can also add them to the Quick Access Toolbar. If you subscribe to Office 365 or have Office 2019, you can also add them to the Ribbon.
If you take a close look at the code, you’ll see there are additional lines on some that allow you to set options for that type of control. As one example, the Date Picker includes options for the calendar type, date format and date language. In use, you would alter these options to suit the client, then run the macro to add a control with those options set.
Content Controls for macOS: Setting the Options
Here’s where you can really customize the Content Controls. These are generic options that can be set for all Content Controls. Rather than bulk up each individual macro, here’s one macro to set the extra options. Set the options in code, select a Content Control that you’ve already inserted, then run the macro. If you’re inserting many controls that have a common setting, like .LockControl = True, add that line to the code for inserting the control to avoid extra steps.
Sub SetOptions()
  If Selection.Information(wdInContentControl) Then
    With Selection.ParentContentControl
      'Sets the appearance to the original bounding box look. For the newer tags look, use wdContentControlTags
      'If you don't need to change a setting, comment it out before running the macro
      .Appearance = wdContentControlBoundingBox

      'Sets the color of the control to a preset color
      .Color = wdColorWhite

      'Sets the Word Character style to use for the text formatting. This will fail if you use a Paragraph style or forget to create the style before running this. This does _not_ change the placeholder text appearance, just the entered text that replaces it.
      .DefaultTextStyle = "Big"

      'Sets whether the Content Control can be deleted or not. If the control has had .Temporary = True applied, you must reverse that property to True before applying this.
      .LockContentControl = True

      'Sets whether the contents of the Content Control can be deleted or not.
      .LockContents = False

      'Sets the placeholder text or prompt for the control
      .SetPlaceholderText , , "Default Text"

      'Sets the Content Control tag property
      .Tag = "Tag"

      'If this is set to true, the Content Control will be removed when the contents are edited.
      .Temporary = False

      'Sets the title of the Content Control. This appears on a tab above the control when it is activated.
      .Title = "Title"
    End With
  Else
    MsgBox "Please select a Content Control to change its options."
  End If
End Sub
Perhaps you need to create a date picker in a different language. Starting with the macro above for U.S. English dates, you can modify it to create a French date picker:
Sub AddFrenchDatePickerCC()
  Dim oCC As ContentControl
  Set oCC = ActiveDocument.ContentControls.Add(wdContentControlDate, Selection.Range)
  With oCC
    .DateCalendarType = wdCalendarWestern
    .DateDisplayFormat = "d MMMM yyyy"
    .DateDisplayLocale = wdFrench
  End With
  Set oCC = Nothing
End Sub
Utility Macros
The following macros perform essential functions that may only be occasionally required. First, a pair to toggle all Content Controls between the older Bounding Box appearance and the newer Tags look. The only control that currently displays as a tag in macOS is the Group Content Control. All others appear as plain text in a mysterious field. As a consequence, don’t use this setting for forms to be used on a Mac. Save it for Windows clients:
Sub BoundingBoxAppearance() 'Sets all Content Controls in the document to a bounding box appearance
  Dim oCC As ContentControl
  For Each oCC In ActiveDocument.ContentControls
    oCC.Appearance = wdContentControlBoundingBox
  Next oCC
  Set oCC = Nothing
End Sub

Sub TagAppearance() 'Sets all Content Controls in the document to the tag appearance.
  Dim oCC As ContentControl
  For Each oCC In ActiveDocument.ContentControls
    oCC.Appearance = wdContentControlTags
  Next oCC
  Set oCC = Nothing
End Sub
This macro deletes the existing list of a Combo Box or Drop-Down and replaces it with a new list.
Sub ReviseComboBoxOrDropDownList()
  If Selection.Information(wdInContentControl) Then
    If Selection.ParentContentControl.Type = wdContentControlComboBox Or Selection.ParentContentControl.Type = wdContentControlDropdownList Then
      With Selection.ParentContentControl
        .DropdownListEntries.Clear
        .DropdownListEntries.Add "Choose an item.", value:=""
        .DropdownListEntries.Add Text:="List Item 1", value:="1"
        .DropdownListEntries.Add Text:="List Item 2", value:="2"
      End With
    End If
  Else
    MsgBox "Please select a Combo Box or Drop-Down Content Control to change its list."
  End If
End Sub
Finally, one to ungroup a Group Content Control. Switch to Tag view to see Groups, they’re invisble in Bounding Box view. Don’t try to select all group items before ungrouping, it will generate an error. Instead, single-click anywhere inside the group:
Sub UnGroupCC() 'Ungroups a group control
  If Selection.Information(wdInContentControl) Then
    Selection.ParentContentControl.Ungroup
  End If
End Sub
For more in-depth reference on these macros, please see Microsoft’s documentation.
Now you’re equipped to send your client top-quality fillable forms with the latest technology. So when your client asks if you can create Content Controls, instead of saying “Huh?”, you can reply confidently “No problem!”

